
The History and Legacy of the CETME Rifle And Guide to CETME Parts Kits
Aug 13th 2024
The CETME rifle holds a special place in the history of military firearms. Developed in post-war Spain, it became the foundation for one of the most iconic rifles in the world—the H&K G3. Today, the CETME is revered not only by collectors and firearms enthusiasts but also by those interested in assembling their own rifles from parts kits. This comprehensive guide delves into the history of the CETME rifle, its evolution, and how you can build your own using CETME parts kits.
A Brief History of the CETME Rifle
The CETME rifle, officially known as the "Centro de Estudios Técnicos de Materiales Especiales," was developed in the 1950s in Spain. The rifle was the brainchild of a team led by German engineer Ludwig Vorgrimler, who had previously worked on the StG 45(M) during World War II. This experience played a crucial role in the design of the CETME, which utilized a roller-delayed blowback system—a design that would later be seen in other iconic firearms like the H&K G3.
Initially, the CETME rifle was intended for the Spanish military, but it quickly garnered international attention. In fact, the German Bundeswehr (Federal Defense Forces) adopted a modified version of the CETME, which eventually became the H&K G3. This connection further solidified the CETME’s place in firearms history, as it was directly responsible for influencing the design of one of the most widely used battle rifles of the 20th century.
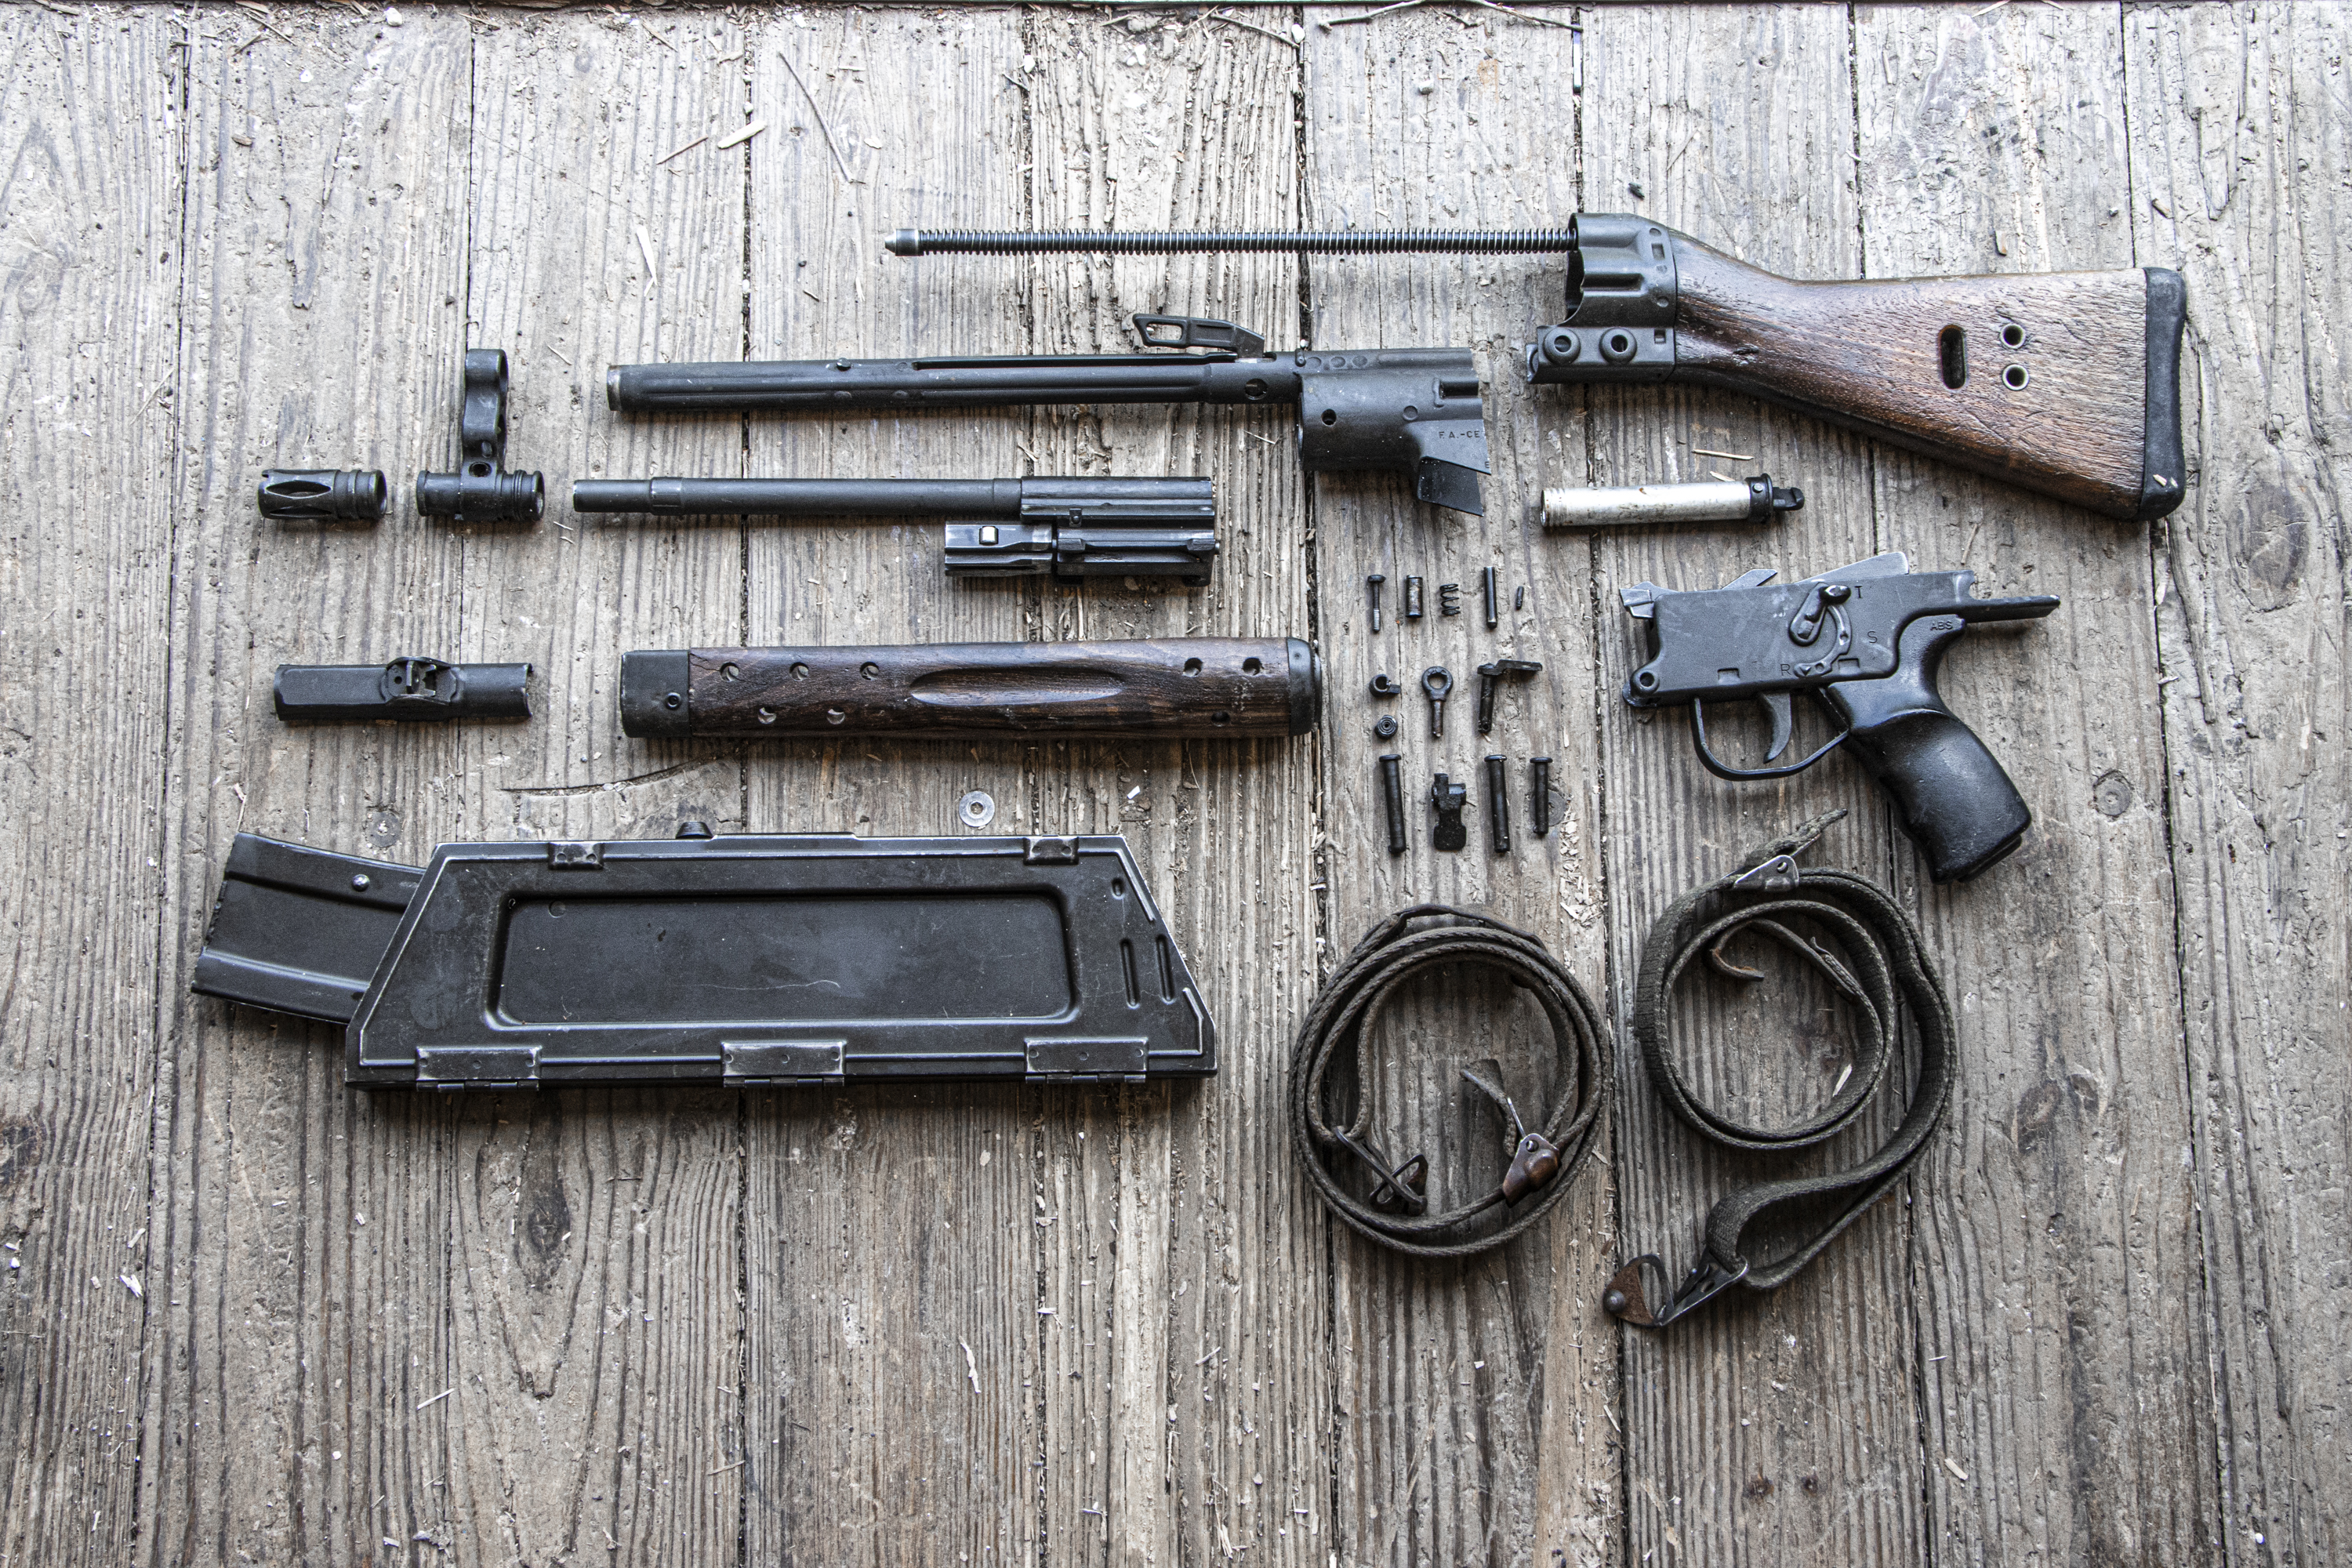
Understanding CETME Parts Kits
For firearms enthusiasts and builders, CETME parts kits offer a unique opportunity to own a specific piece of history. These kits typically include the majority of the components needed to assemble a functioning rifle, minus the receiver, which must be purchased or manufactured separately in compliance with local laws.
Key Components of CETME Parts Kits:
- Barrel: The barrel is one of the most critical components in any firearm. In CETME parts kits, barrels are often cut to comply with regulations, meaning you'll need to install a new one or re-weld the original.
- Bolt Assembly: The bolt assembly in a CETME rifle is crucial for the roller-delayed blowback system. Properly reassembling and headspacing the bolt is vital for the rifle’s safe and effective operation.
- Trigger Group: The trigger group, usually included in CETME parts kits, may need some modification to ensure it functions correctly, especially if you’re building a semi-automatic rifle.
- Stock and Furniture: The stock and furniture components of CETME kits are often wooden and may show signs of wear. Refinishing or replacing these parts can give your rifle a more polished appearance.
- Receiver Components: While the main receiver is not included in parts kits due to legal restrictions, many kits will include smaller receiver components, such as the trunnion and cocking tube. These will need to be fitted to a new receiver during assembly.
Building Your CETME Rifle: A Step-by-Step Guide
Assembling a CETME rifle from a parts kit is a rewarding project, but it requires careful attention to detail. Below is a step-by-step guide to help you through the process.
- Gather Your Tools and Parts:
- Before beginning, ensure you have all necessary tools, including a press for the barrel, welding equipment, and a headspace gauge. You’ll also need to source a receiver or build your own from a flat.
- Inspect and Prepare Parts:
- Begin by thoroughly inspecting all parts in your kit. Check for any wear or damage, especially in the bolt and trigger group. Clean and prep the parts as necessary.
- Barrel Installation:
- If your kit includes a cut barrel, you’ll need to either weld it back together or purchase a new one. Press the barrel into the trunnion, ensuring it is correctly aligned.
- Assemble the Bolt and Carrier:
- Reassemble the bolt and carrier, taking care to properly install the rollers and springs. Check the headspace using a gauge to ensure the rifle will function safely.
- Install the Trigger Group:
- Fit the trigger group into the lower receiver. Depending on your kit and receiver, some modification might be necessary. Test the trigger to ensure it functions correctly.
- Fit the Receiver Components:
- Weld or rivet the remaining receiver components, such as the trunnion and cocking tube, to the new receiver. This step requires precision, as improper alignment can lead to malfunctions.
- Install Stock and Furniture:
- Attach the stock and other furniture components. Consider refinishing these parts to match your aesthetic preferences.
- Final Assembly and Testing:
- Once all components are assembled, perform a final inspection and function check. Test the rifle with dummy rounds before proceeding to live fire.
Where to Find CETME Parts Kits
CETME parts kits can be found through various online retailers specializing in surplus firearms. Due to the popularity of these kits, availability can fluctuate, so it’s essential to act quickly when you find one. Keep an eye on reputable dealers and surplus stores, and be sure to comply with all local and federal regulations when purchasing and building your rifle.
Conclusion
The CETME rifle is more than just a firearm; it’s a piece of history that has influenced modern military rifles worldwide. Building your own CETME rifle from a parts kit is a rewarding challenge that allows you to connect with this legacy on a personal level. With the right tools, knowledge, and attention to detail, you can create a functioning piece of history that is both unique and deeply satisfying to own.
Whether you’re a seasoned gunsmith or a hobbyist looking for your next project, CETME parts kits offer a fascinating and fulfilling experience. Dive into the world of CETME rifles, and discover the joys of bringing a historic firearm back to life.
Check Out Our Selection of CETME Parts, Parts Kits, and Accessories Here